Introduction
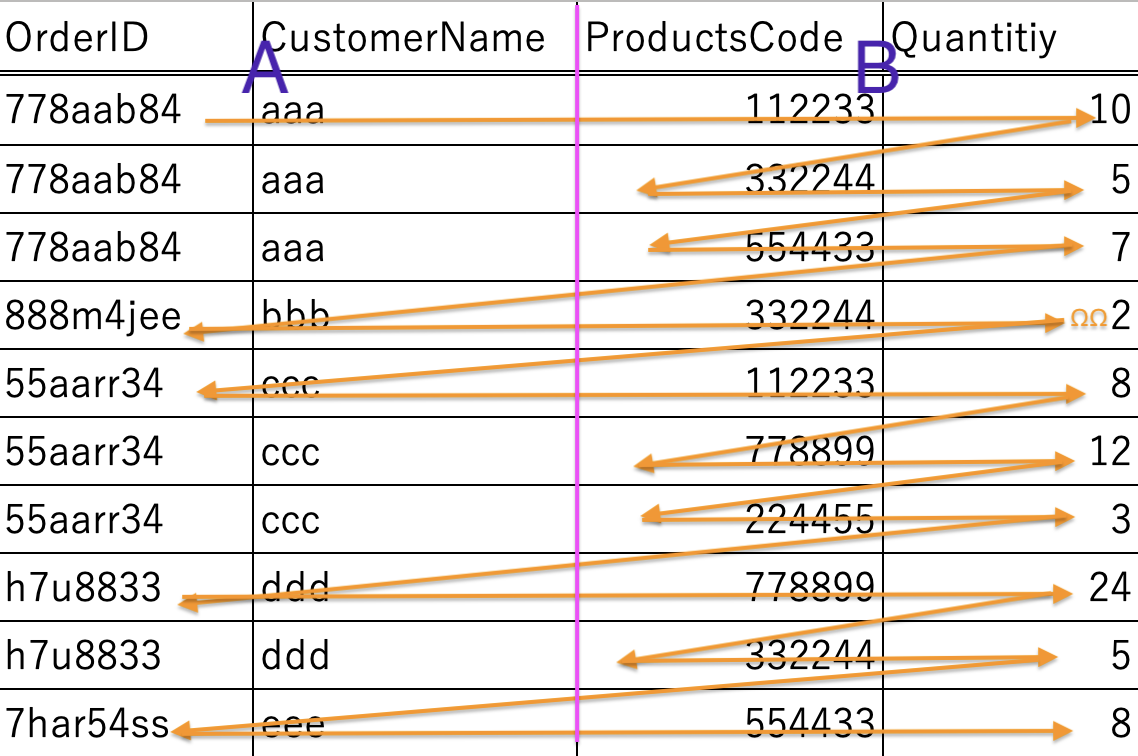
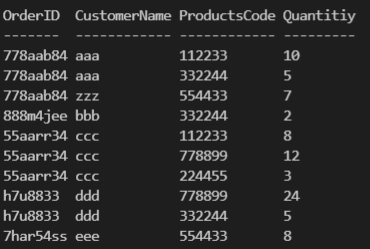
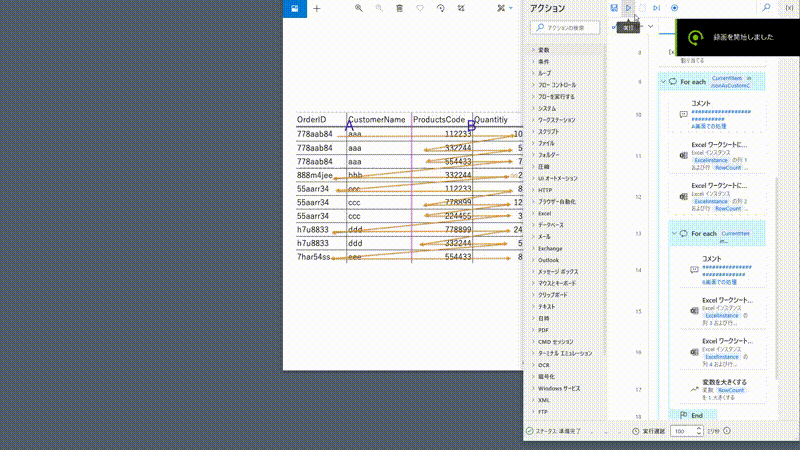
Have you ever seen an Excel or CSV like the following?
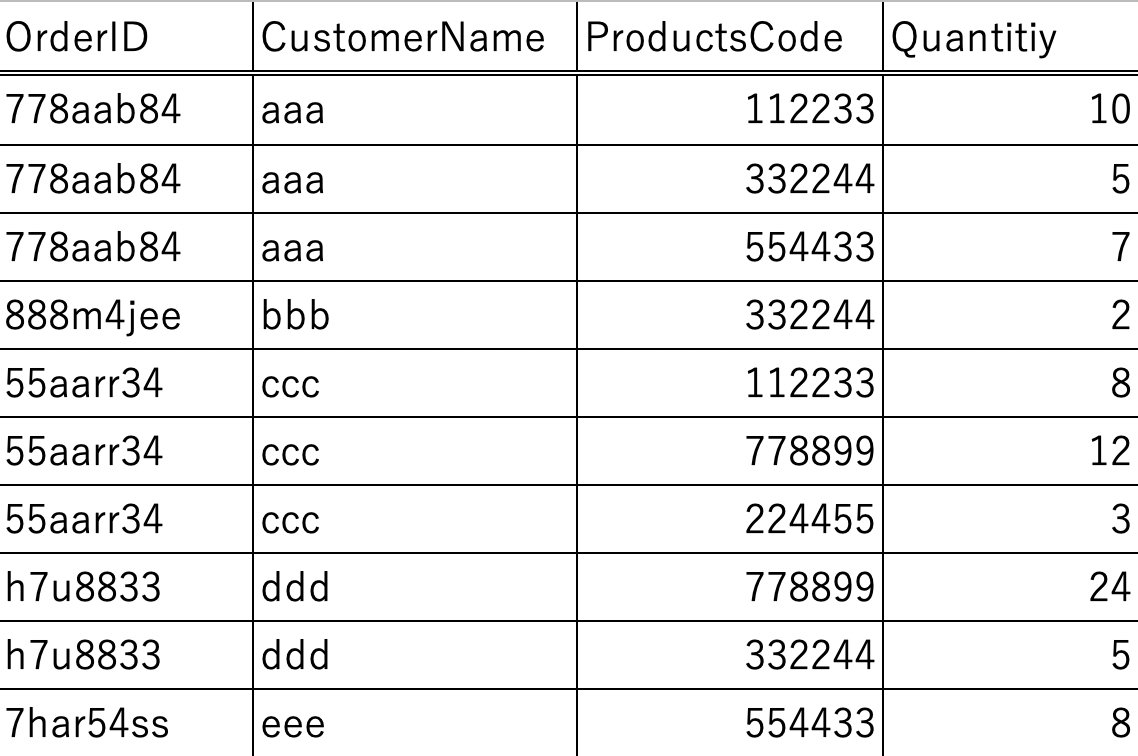
The request is to post the data to some system. After entering the OrderID and CustomerName data on screen A, the user moves to screen B and enters the ProductsCode and Quantity data. The operation indicated by the arrows, switching between the A and B screens, and data registration are required.
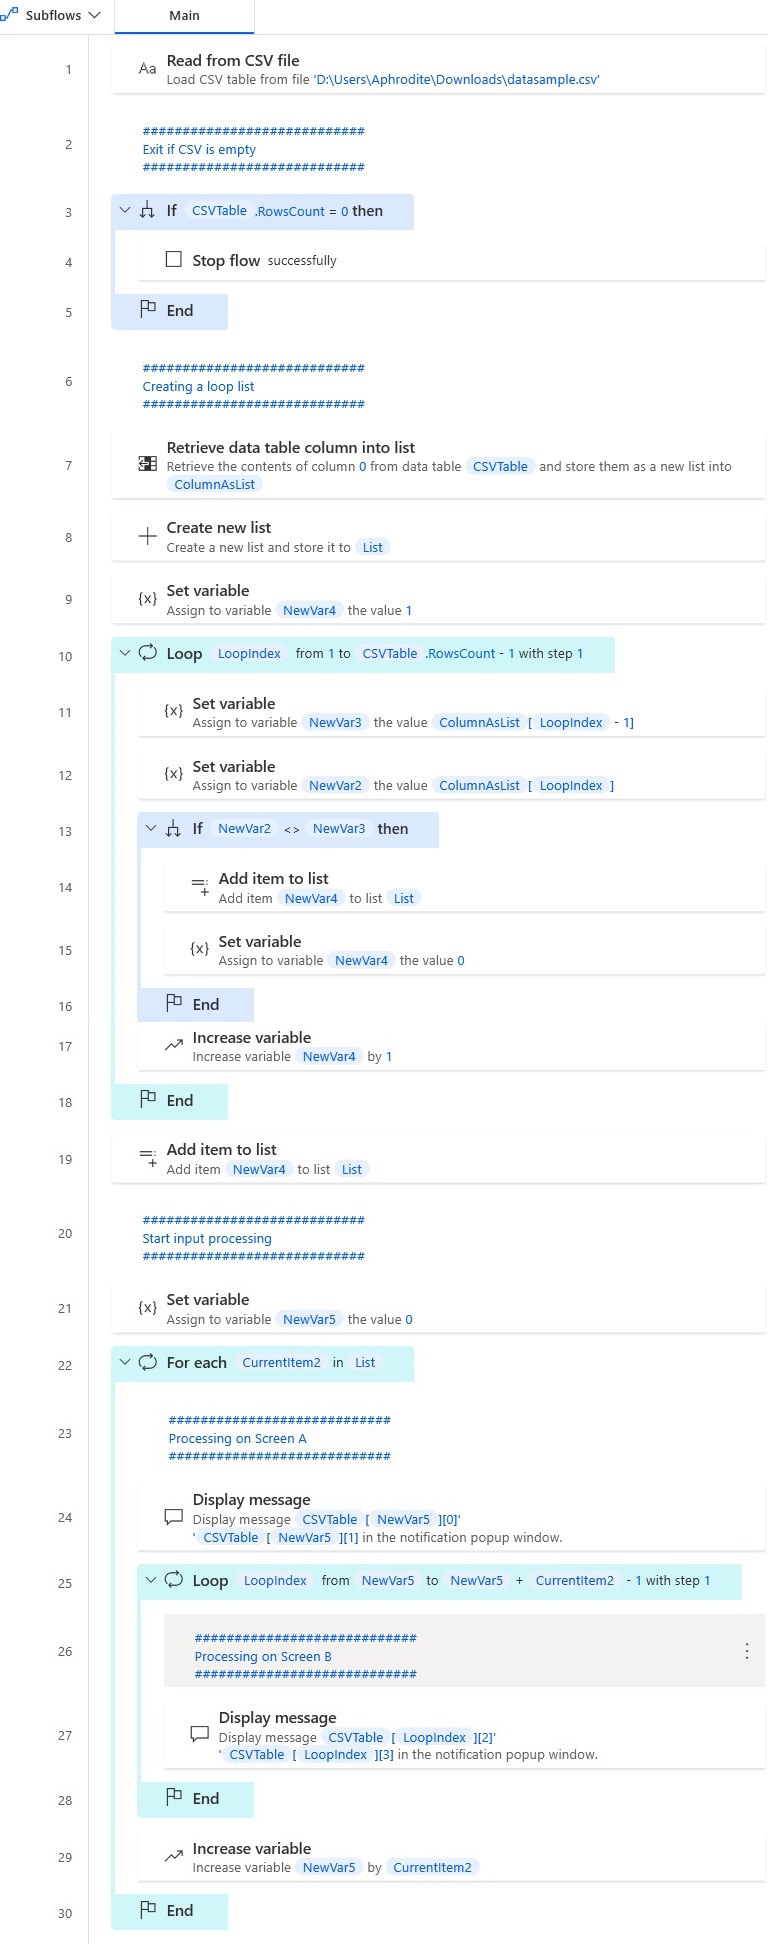
This flow can be created using only the basic actions of Power Automate for desktop. However, as you will see when you actually create it, unlike a flow that simply processes one line at a time, the number of actions is quite large. The complexity increases as various practical processes are added to this flow. Even if documentation and comments are written, the more complex the flow becomes, the longer it will take to change and correct problems as they arise.
ex1. Flow created with only basic actions
In conclusion, when handling such data tables in Power Automate for desktop, the number of actions can be greatly reduced and the flow simplified by converting them to custom object types rather than trying hard to keep them as data table types. That is what I myself wanted to know first.
Is it good to convert to a custom object type?
However, when converting to a custom object type, the data table is converted once to a list-type JSON with a hierarchical structure. After that, you can load it into Power Automate for desktop as a custom object, so that you only need to do a ForEach loop.
ex2. exactly the same behavior as ex1 implemented with a flow that converts to a custom object type
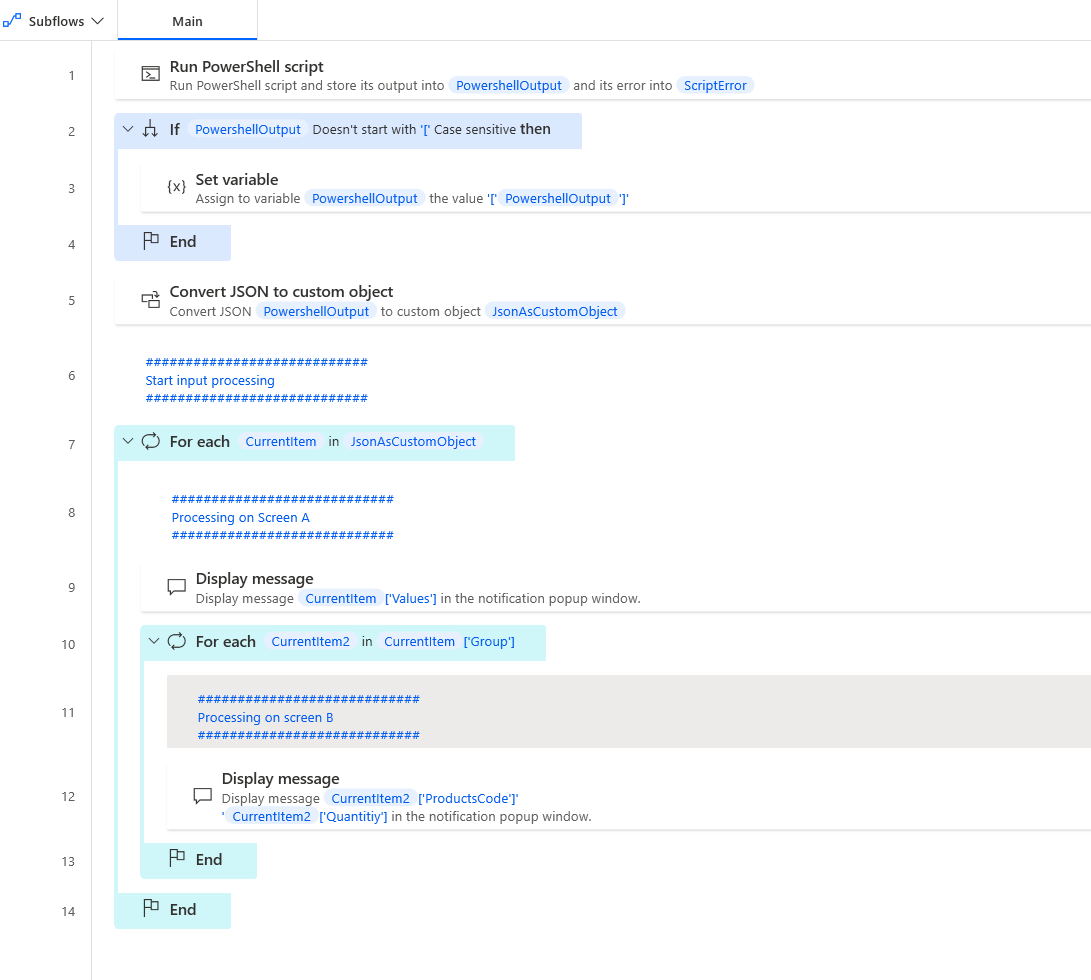
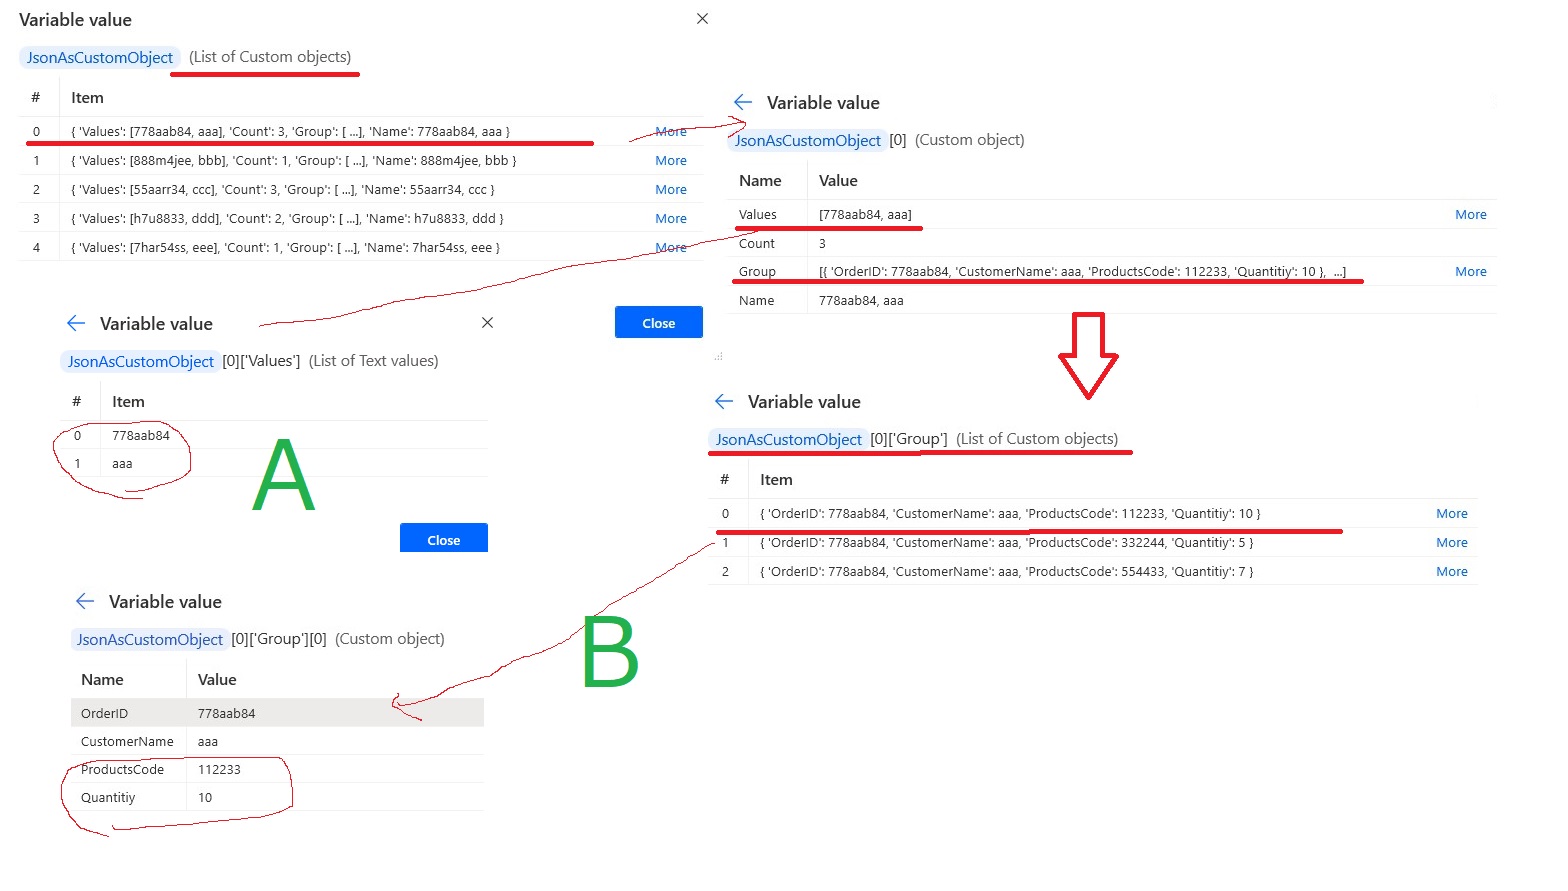
You can see that the number of actions is less than half and the number of variables used is also less.
You might think that you are writing a lot of scripts in the “Run PowerShell Script” action. But this time, the script is only one line.
Flow Description
1. Running PowerShell Scripts
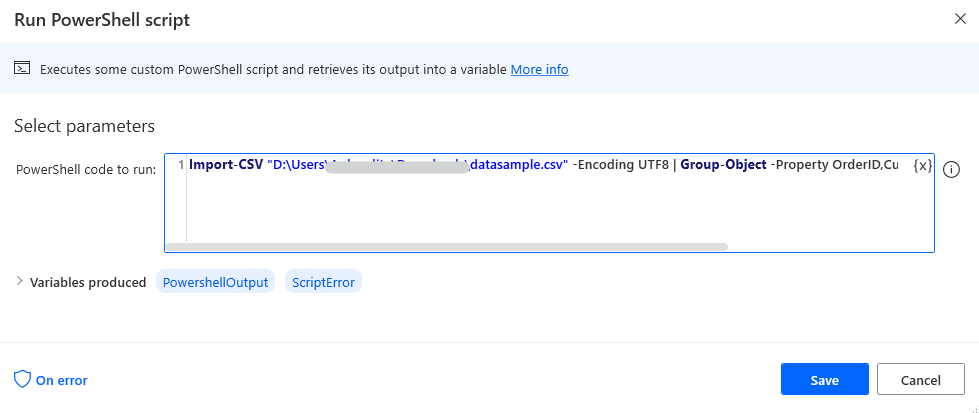
Import-CSV "Your File path\datasample.csv" -Encoding UTF8 | Group-Object -Property "OrderID","CustomerName" |ConvertTo-Json 3
The cmdlets are piped one-liners. It is difficult to see as it is, so pipe line breaks.
Import-CSV [[-Path] <string[]>] [-Encoding <string>]] |
Group-Object [[-Property] <Object[]>] |
ConvertTo-Json [[-Depth <int>]]
Description of cmdlets
-
Import-CSV
Describe the path of the CSV file and the encoding format of the file to read. Note that the encoding format must be the same or the characters will be garbled.
-
Group-Object
Specify the columns you want to group in -Property. As shown in the example, multiple columns can be specified; the key is to return a GroupInfo object without using the AsHashTable parameter. This allows output as list-type JSON. Note that if there is only one group, it will not be a list type, so you will need to be creative in the subsequent flow.

-
ConvertTo-Json
Output in JSON format. All values are in text type. When the Depth parameter is 2, the third level is output as a hash table. If not specified, the default value is 2.
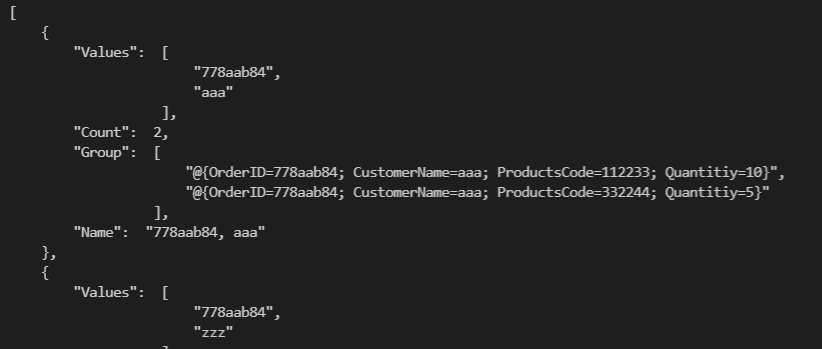 By setting the Depth parameter to 3, the third level can be expanded to JSON format.
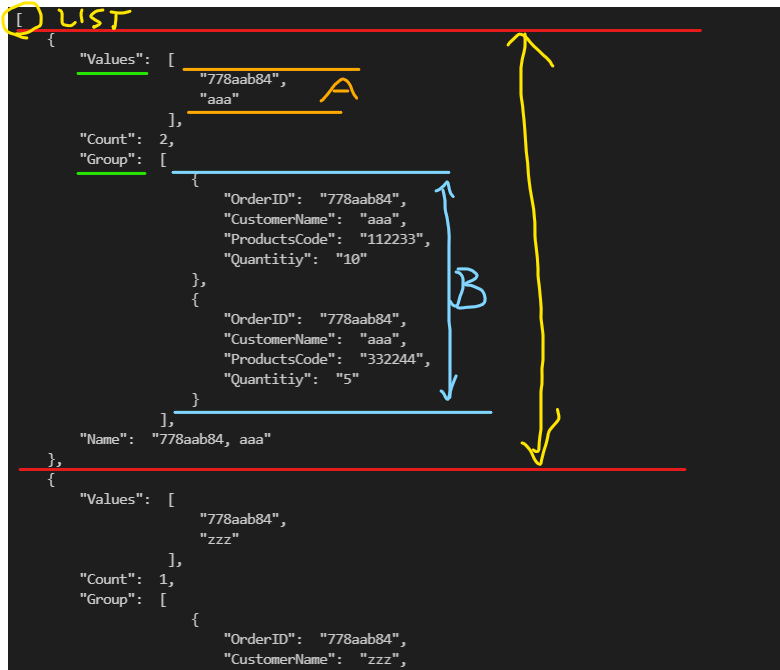
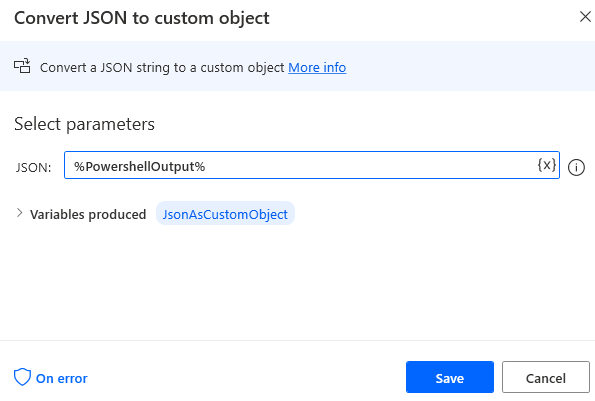
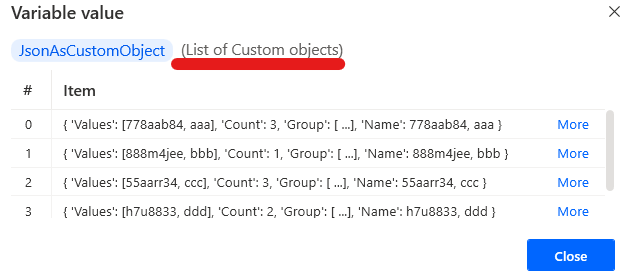
Let’s check it by loading %PowerShellOutput% into the “Convert JSON to custom object” action. You can see that it is a “List of Custom Object” with a hierarchical structure. Grouped into Values and Groups.
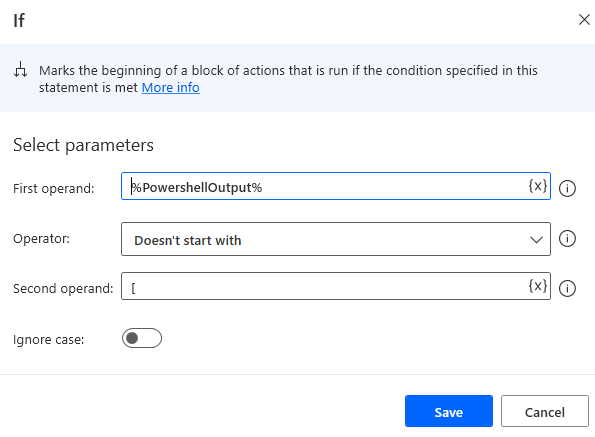
2.If
If only one group can be configured, %PowershellOutput% will not be a list type JSON. Then, the first character of %PowershellOutput% is judged and it is judged if it is not “[”.
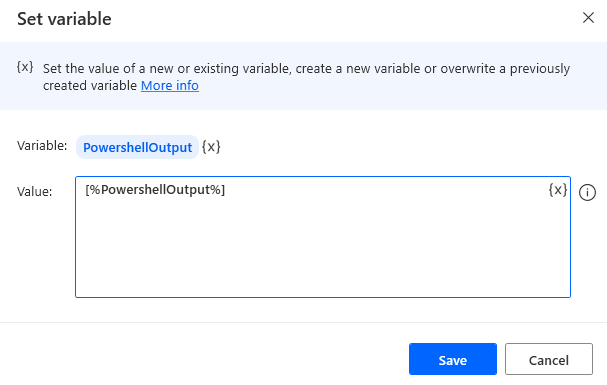
3.Set variable
If the first character is not “[”, make it a list with only one value.
Overwrite %PowershellOutput% with [%PowershellOutput%].
4.End
5.Convert JSON to custom objects
6.Comment
############################
Start input processing
############################
7.For Each
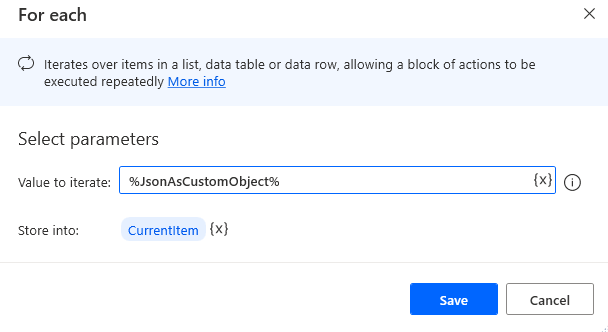
Since %JsonAsCustomObject% is a list, loop with ForEach.
8.Comment
############################
Processing on Screen A
############################
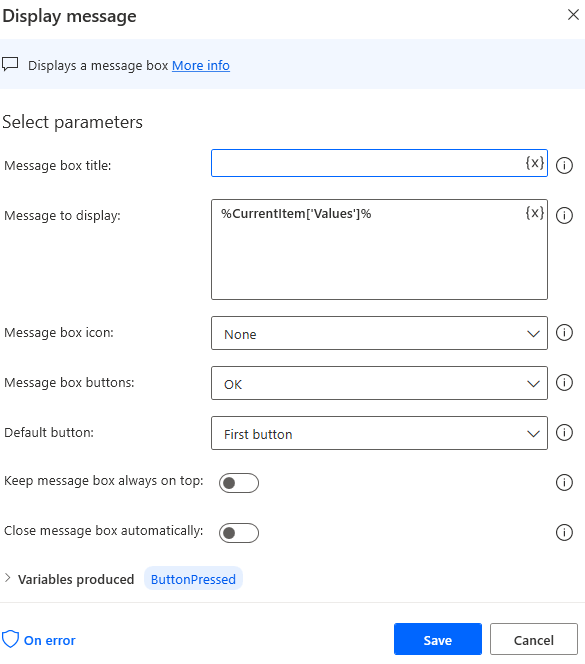
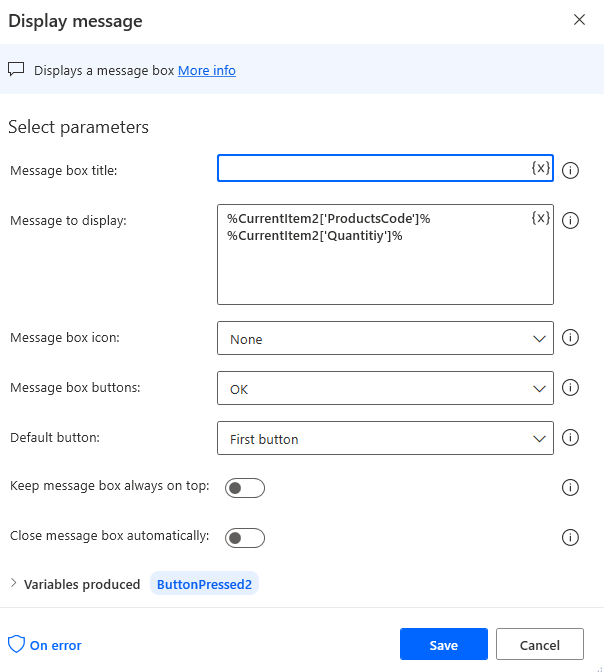
9.Display messeage
For verification
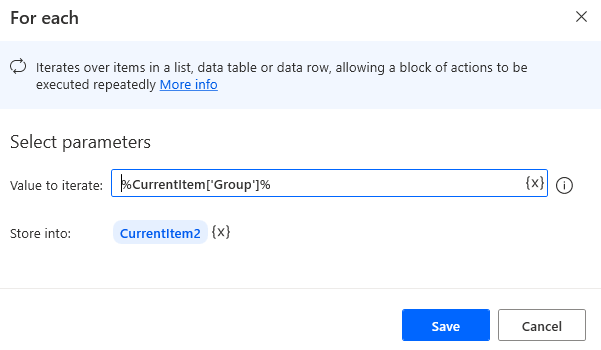
10.For Each
11.Comment
############################
Processing on screen B
############################
12.Display messeage
For verification
13.End
14.End
The “Display message” action was tested by changing it to a “Write to Excel worksheet” action.
Conclusion
The data table was converted to grouped JSON and loaded as a custom object, which could be refactored significantly. However, the order of the data should be kept in mind.
PowerShell can use Sort-Object, Select-Object, and Where-Object. We recommend that you try this method, as it is even more powerful when combined with this method.
Postscript
Unfortunately, around me, the API-connected world line is far away and there is a lot of Excel CSV data. In practice, I have dealt with data like the one discussed in this article many times. But unfortunately, as a self-taught person, I could not find any decent information on how to handle such data, not only in Power Automate for desktop, but also in other automation tools. Certainly, it is possible to create a system with only basic operations, and even if the number of operations can be reduced somewhat by using SQL, the flow will inevitably become more complex. In fact, anything that works is not necessarily good enough. The more complex the flow, the more difficult it becomes to read and, consequently, the more difficult it becomes to maintain. As a result, sustainability is lost. Indeed, it does. I have created such flows. That’s why I personally wanted it in Docs or Learn, and it was the first tip I wanted to know.
Notes
- Power Automate for desktop 2.17.169.22042
- Windows 10 pro 21H2
- PowerShell 5.1.19041.1320
- It’s routine, but at your own risk.
- This article is mostly machine translated.